Video programming & text mode
You've probably by now played around with text IO. But text IO is slow, and we're dealing with a 4.77MHz processor. We're also the only program running at the moment, so we have full control over the computer and mustn't bow down to "good practices". So we'll print to the screen directly!
The video card we'll be using, the Color Graphics Adapter, was given a fixed memory range from 0xB8000 to 0xBC000. This means that by writing to these addresses, we can potentially edit what is shown on the screen (This is remarkably simple compared to other computers at the time that used sprites).
The CGA chip supported multiple modes, each of which used a different range of video memory. When you launched your program in your DOSBox-X environment, you were in a 80x25 text mode. A text mode is one where the video memory contains not individual pixels, but text characters. The video chip would then generate the pixels on-the-fly each frame.
So let's try clearing the screen by writing 2000 zeroes to 0xB8000. Remember what I had said previously about using far pointers.
uint16_t far *ptr = MK_FP(0xB800, 0);
for(int i = 0; i < 2000; i++) {
	*(ptr++) = 0;
}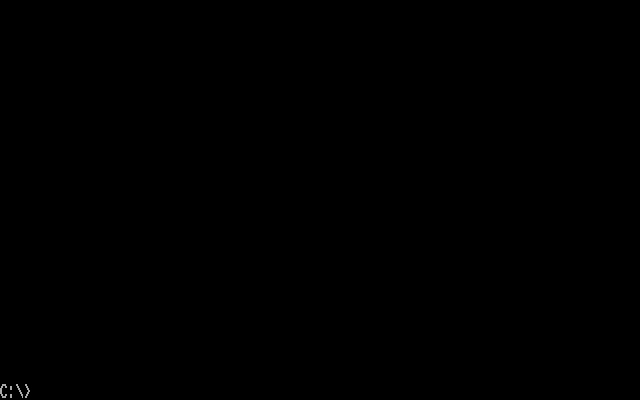
This is to be completely expected. The program had exited, so we returned to the shell. The reason the C:\> is not at the top is because we only cleared the screen. The "next character" pointer in MS-DOS had not changed.
Note that we have a uint16_t pointer. This is because each character requires two bytes. The lower is the character code, the higher - the attributes. The attribute byte is split into 2 4-bit (nibble) groups. The low nibble corresponds to the foreground, the high - to the background.
uint16_t far *ptr = MK_FP(0xB800, 0);
for(int i = 0; i < 2000; i++) {
	*(ptr++) = 0x0F03;
}
No screenshot here; it's a surprise :).
Hexadecimal is nice to work with in this situation because each hex digit corresponds to 4 bits, which is the unit we're working with.
FG ATTR --\
		  v
		0x0F03    CHAR CODE
		   ^
BG ATTR ---/


INTENSITY/BRIGHT BIT
         v
 0xE = 0b1110 (light yellow)
          ^^^
RGB| Attribute ID | Color |
|---|---|
| 0 | #000000 |
| 1 | #0000AA |
| 2 | #00AA00 |
| 3 | #00AAAA |
| 4 | #AA0000 |
| 5 | #AA00AA |
| 6 | #AA5500 |
| 7 | #AAAAAA |
| 8 | #555555 |
| 9 | #5555FF |
| A | #55FF55 |
| B | #55FFFF |
| C | #FF5555 |
| D | #FF55FF |
| E | #FFFF55 |
| F | #FFFFFF |
You should note the binary pattern in that color sequence. The outlier in the pattern is color 6.
I expect you to play around with this as well. But not for long, since we'll be switching to a graphics mode (or not, you can stay in text mode if you want).
Mode types and switching
To switch modes would require us to access the BIOS. This would mean we'd have to write Assembly, but OpenWatcom can actually do it for us. We just need to include i86.h.
union REGS regs;
regs.w.ax = 0x0004;
int86(0x10, ®s, ®s);I won't go too into detail, since there isn't much to customize. Essentially we're initiating a BIOS call (function 0x10). The low byte of ax, 0x04 here, specifies the mode.
| Mode ID | VRAM range start | Description | With RGB monitor | With composite monitor |
|---|---|---|---|---|
| 0 | 0xB8000 | Textual 40x25 | 16 colors | 16 shades |
| 1 | 0xB8000 | Textual 40x25 | 16 colors | 16 colors |
| 2 | 0xB8000 | Textual 80x25 | 16 colors | 16 shades |
| 3 | 0xB8000 | Textual 80x25 | 16 colors | 16 colors |
| 4 | 0xB8000 | Graphical 320x200 | 4 colors | 4 colors |
| 5 | 0xB8000 | Graphical 320x200 | 4 colors with alternate palette | 4 shades |
| 6 | 0xB8000 | Graphical 640x200 | 2 shades | 2 colors |
The other text modes don't need more explanation. Before we continue, I'd like to note that (in 80x25 text modes only) accessing VRAM at the wrong times (almost always) can produce a "snow" effect. This is because your accesses clash with the video card's own. Here's an example I found online (credits to "archeocomp"):
The only way to avoid this issue is to draw during vertical synchronization, but there is no event-based mechanism to determine vsync like on other computers. The only way is polling, which just ain't happening at 4.77MHz.
Let this make you reconsider whether to use 80x25 in your project. DOSBox-X doesn't emulate snow, so it's not necessarily a problem.
Graphics modes
These have a lot in common. The big difference is how the pixels are addressed. To save memory pixel data is crammed as little space as possible, so we'll need to do a bunch of bitwise operations to draw.
One thing that will be a pain for you is that the rows are interleaved. Starting at 0xB8000, every 80 bytes account for an even row 0, row 2, etc! 8192 bytes afterward, at 0xBA000, is the same thing, but the odd rows 1, 3, etc. If you have a sprite renderer, you should encode your sprites in such a way to make decoding & drawing faster.
320x200
Here each 2-bit group in each byte corresponds to one pixel. Those 2 bits are enough to encode a 4-state value.
When you try drawing in this mode, you'll notice the real big ugliness of the palette (animated):
(I want you to feel the 4.77MHz. This is as fast as I could get it in pure C)
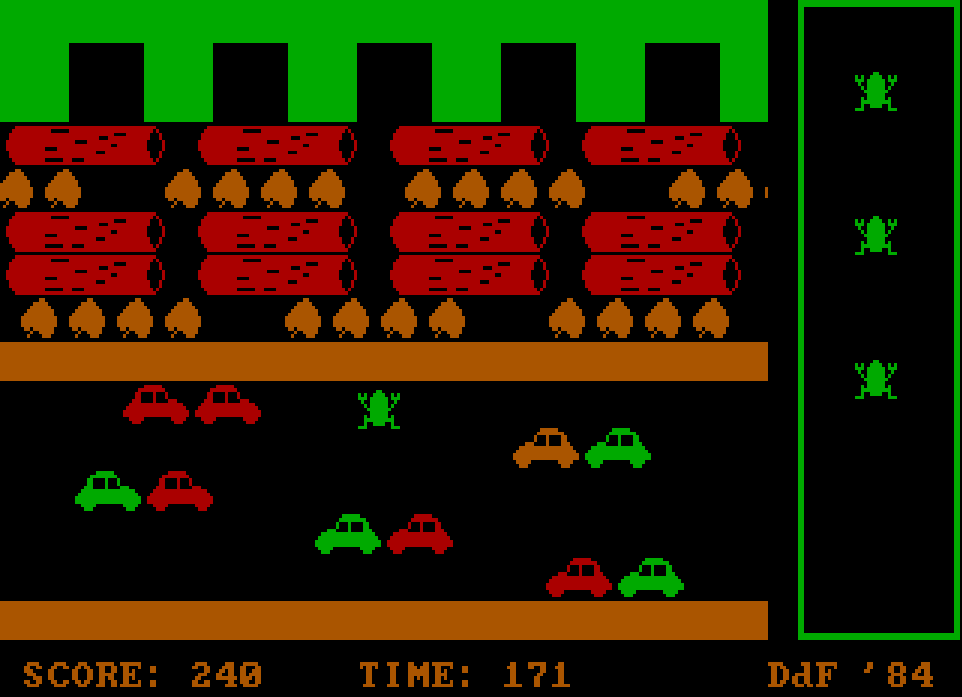
This is because gaming was not a consideration when this palette was designed. It was actually created for business purposes, and these colors were great for charts and diagrams. There is, however, another palette you can try. The CGA has a special byte-sized register at IO port 0x3D9 which controls a few color details. The fifth bit controls the palette. By changing it we'll switch our palette. We'll use the inb and outb functions that came with the template.
uint8_t b = inb(0x3D9);
b = b & ~(1 << 5); // Set the 5th bit to zero
outb(0x3D9, b);
After this, you'll get a different palette. It's still pretty ugly but it can be used for more "natural" scenes. Here is Frogger:
Both of these palettes can use a different color in place of black. This is configurable with bits 0 through 3 of the color control register. Refer to the color table above.
b = (b & 0xF0) | 0x09; // 0x09 : Light blue
outb(0x3D9, b);
Both of these palettes also can be darkened or lightened using the "global bright bit", bit 4 in the color control register. The configurable color is not affected.
b = b ^ (1 << 4); // Toggle the global bright bit
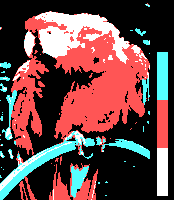
outb(0x3D9, b);When connected to an RGB monitor, mode 5 will give a third palette with black, cyan, red and white. This one is not forward-compatible with newer computers.
620x200
Twice the pixels, but half the colors: black and custom. Here, each bit accounts for one pixel.
The bright bit makes no difference in this mode. If you're looking for high-resolution UI, this is the one.
There's not much else to say, so we'll continue.
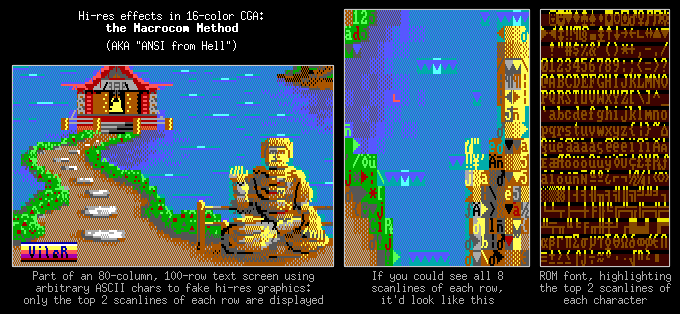
160x100
This is by far the most advanced "mode" we'll be covering but it's simple once you understand it. It is in fact not a real mode at all, but the 80x25 text mode modified. Doing so causes each character to be cropped, showing only two rows, and as a result making all the rows denser. This really neat trick lets you have 16 colors in what looks like a graphical mode.
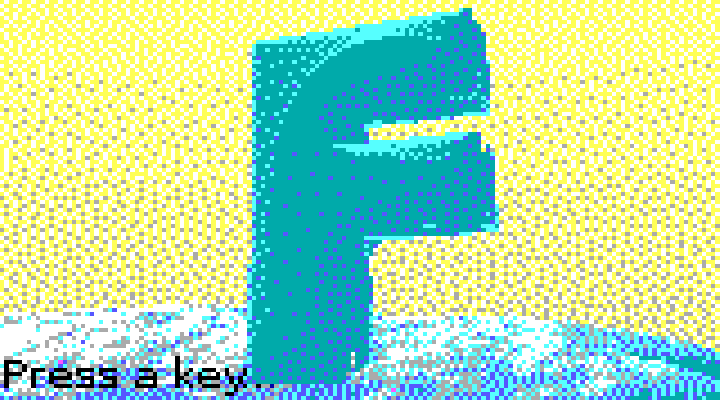
This FutureDOS splash screen was rendered in this mode.
For this, we need to set mode 3, and then send a bunch of data to the video controller ports:
union REGS regs;
regs.w.ax = 0x0003;
int86(0x10, ®s, ®s);
outb(0x3D4, 0x04);
outb(0x3D5, 0x7F);
outb(0x3D4, 0x06);
outb(0x3D5, 0x64);
outb(0x3D4, 0x07);
outb(0x3D5, 0x70);
outb(0x3D4, 0x09);
outb(0x3D5, 0x01);If you want an explanation, you don't get one because I don't know it myself 8).
After this, set all of the characters in the screen to 0xDE. 0xDE is a rectangle, where half of the character is the foreground color and half is the background color. Since the mode gave us 4x2 characters, 0xDE will appear to "split" each character into two 2x2 pixels. Now, using the attribute byte we control their color.
(Since this is 80x25 text mode, there is no row interleaving happening, but there will be the snow effect)
I say that using 0xDE is necessary, but that's not really true. If you choose your characters correctly, you can take advantage of "ASCII art" to create even more high-resolution images.
While the ones I've showcased here are not the most advanced modes, others are too demanding.